

Hey there, folks! As a supplier of 4K LED video walls, I've seen my fair share of installations, both good and bad. And let me tell you, mounting a 4K LED video wall isn't as straightforward as it might seem. There are a bunch of factors you gotta consider to make sure you get the best results. So, in this blog, I'm gonna share with you what I think is the best way to mount a 4K LED video wall.
Planning is Key
First things first, you need to do some serious planning. This ain't a weekend DIY project where you just wing it. You gotta figure out where the video wall is gonna go, who your audience is, and what kind of content you'll be displaying.
Think about the viewing distance. If people are gonna be sitting far away, you can go with a larger pixel pitch. But if it's a close - up viewing situation, like in a control room or a small conference room, you'll want a smaller pixel pitch for that crisp, clear 4K image.
For example, our P1.87mm 4K LED TV/ Ultra HD LED Video Wall with 16:9 Aspect Ratio for Conferences is perfect for conferences where the audience is relatively close. The small pixel pitch ensures that the details are sharp, no matter how close people are sitting.
Also, the room's lighting is super important. If there's a lot of ambient light, you'll need a video wall with high brightness. And if you're dealing with a dark room, high contrast is what you're looking for.
Choosing the Right Mounting System
There are different types of mounting systems for 4K LED video walls, and picking the right one is crucial.
Fixed Mounts
Fixed mounts are a pretty straightforward option. They're simple, cost - effective, and good for set - up where the video wall won't need to be adjusted often. If you're mounting the video wall in a lobby or a public space, a fixed mount might work just fine.
Tilting Mounts
If you want a bit more flexibility, tilting mounts are a great choice. You can adjust the angle of the video wall to reduce glare or to get the perfect viewing angle. This is really useful in places like classrooms or conference rooms where the seating arrangement might vary.
Articulating Mounts
Articulating mounts are the most flexible of them all. They allow you to extend, retract, tilt, and swivel the video wall. These are ideal for situations where you need to change the position of the video wall frequently, like in a studio or a trade show booth.
Preparing the Installation Surface
Before you start mounting, you need to make sure the installation surface is up to the task. It has to be strong enough to support the weight of the video wall. A weak or uneven surface can lead to problems like sagging or misalignment.
If you're mounting on a wall, check for studs. Mounting directly into studs provides the best support. If there are no studs in the right place, you might need to use wall anchors. And if you're mounting on a ceiling, make sure it can handle the weight. You might need to reinforce the ceiling structure.
Installation Process
Once you've got your planning done, your mounting system chosen, and your surface prepared, it's time to start the installation.
Step 1: Assemble the Video Wall Modules
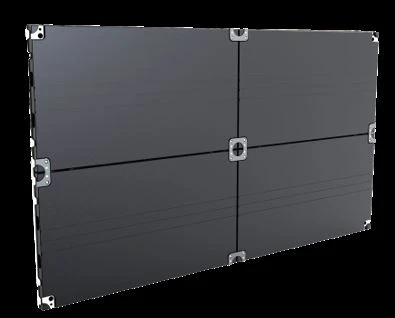
Most 4K LED video walls come in modular form. You'll need to assemble the modules according to the manufacturer's instructions. Make sure all the connections are secure, and the modules are properly aligned.

Step 2: Mount the First Module
Start by mounting the first module using your chosen mounting system. Make sure it's level and plumb. You can use a spirit level to check this. Once it's in place, double - check the connections.
Step 3: Add the Remaining Modules
Once the first module is secure, you can start adding the remaining modules one by one. Make sure each module is properly aligned with the previous one. This is where having a good mounting system really pays off, as it helps with the alignment.
Step 4: Connect the Cables
After all the modules are in place, it's time to connect the cables. You'll need to connect the power cables, data cables, and any other cables required. Make sure all the connections are tight and that there are no loose wires.
Testing and Calibration
Once the installation is done, you need to test the video wall. Power it on and check for any dead pixels or color inconsistencies. You might need to do some calibration to get the colors and brightness just right.
Most modern 4K LED video walls come with built - in calibration tools. You can also use external calibration devices for more precise results.
Our Product Range
At our company, we offer a wide range of 4K LED video walls to suit different needs. For example, our 610x343mm Narrow Pixel Pitch Series is great for high - end applications where you need the best image quality. The narrow pixel pitch ensures a sharp and detailed image.
Our LSP Series Ultra Thin 600*337.5mm Small Pixel Pitch 16:9 Low Cost Front Service LED Video Wall For 2K/4K/8K LED TV is a cost - effective option that doesn't compromise on quality. It's ultra - thin and easy to maintain, making it a popular choice for many customers.
And if you're looking for a lightweight option, our P2.5mm Small Pixel Pitch Ultra HD LED Video Wall/LED Display with Ultra Light Weight Panel is the way to go. It's perfect for installations where weight is a concern.
We also have the P1.25/P1.56/P1.875/P2.5 Front Maintenance/front Service 16:9 Fine Pitch LED Display For 4K/UHD Digital Signage Video Wall, which is designed for easy maintenance from the front. This is really useful in situations where access from the back is limited.
Conclusion
Mounting a 4K LED video wall is a complex process that requires careful planning, the right mounting system, and proper installation and calibration. But if you follow these steps, you can get a great - looking, high - performing video wall.
If you're in the market for a 4K LED video wall or need more information about the mounting process, don't hesitate to reach out to us. We're here to help you make the best decision for your needs.
References
- LED Display Handbook
- Professional AV Installation Guides