

If you’re reading this, chances are you’re either a small business owner looking to spruce up your outdoor storefront, a event coordinator needing a temporary screen for a festival, or just someone who’s tired of overpaying for LED display installation (we’ve all been there). As a P4.81 LED display supplier, I’ve helped tons of folks walk through installing their screens themselves, and let me tell you—it’s way easier than it sounds, even if you’re not a tech whiz. I’ve installed half a dozen P4.81 screens for local clients over the past two years, so I’m not just spouting sales fluff here; this is real, hands-on advice that’s saved people hundreds in labor costs.
First, let’s get clear on what a P4.81 LED display is, just in case you’re new to the space. The “4.81” refers to the pixel pitch, which is the distance between each LED chip in millimeters. For outdoor use, that’s a sweet spot—sharp enough to look crisp from 10-30 feet away, tough enough to handle rain, wind, and even harsh sun, and way more budget-friendly than smaller-pitch screens. Before I jump into the step-by-step, a quick heads up: I’m a supplier, so I’ll link to some related products that work seamlessly with P4.81 screens because that’s what our team tests and stands behind. But this guide is all about making the install doable for you, no extra hoops.
Step 1: Gather Your Tools & Prep Your Workspace
You don’t need a fancy toolbox here—just the basics most people have around the house or can rent cheaply. Here’s my go-to list for P4.81 installs:
- A drill (cordless is a game-changer for rooftop or high-wall jobs)
- A level (spirit level, not the bubble one from a kids’ toy—get a 24-inch one for accuracy)
- A measuring tape (preferably a laser measure if you’re working with big spaces; cuts down on human error)
- Safety gear: work gloves, safety glasses, and a hard hat if you’re lifting heavy panels off the ground
- A ladder or scaffolding (if your screen is going higher than 8 feet—never skip this; fallen screens are the #1 DIY install mistake)
- Cable ties and electrical tape (to keep wires neat, no loose bits flapping in the wind)
- A Phillips-head screwdriver (most LED panels use these for mounting brackets)
Before you start, map out where your screen will go. P4.81 is an outdoor screen, so it needs to be mounted where it’s not blocked by overhangs (unless you want to deal with moisture buildup) and where power is easily accessible. Pro tip: If you’re mounting it on a brick or concrete wall, you’ll need masonry screws and a hammer drill—nothing crazy, just make sure you don’t skip pre-drilling holes or you’ll end up with stripped screws. Also, clear the area around your workspace so you’ve got room to move panels; P4.81 panels are lightweight (most 2x1ft panels are 10-15 lbs) so you don’t need a team, but a clear space makes lifting way smoother.
Step 2: Unbox & Inspect Your P4.81 Panels (Don’t Skip This!)
Here’s where I can tell you from experience: unboxing and checking every panel before you start installing saves you from a huge headache later. I’ve had a client once who started mounting panels on a wall, only to find one had a dead LED chip halfway through—he had to take four panels down to swap it out, which took twice as long.
When you unbox, lay all the P4.81 panels flat on a clean surface (no dirt or gravel) and run through a quick test: plug in the test cable that comes with most LED kits and power on the controller. You’ll see a test pattern pop up—check for any dark spots, flickering, or misaligned LEDs. If anything’s off, contact your supplier right away; most will replace faulty panels for free, no questions asked.
A quick side note: If you’re looking for a durable, weather-proof alternative for larger outdoor setups, we also carry the P10/P16mm Ultra High Brightness (10,000nits) Outdoor Fixed Installation Front Serviceable LED Display/Screen. It Is Perfect for Wall Mounting Outdoor LED Video Wall and No Need AC for Cooling — it’s great if you’re planning a bigger permanent install and want to skip the cooling hassle. But back to your P4.81: these panels are modular, which means you can mix and match to get the exact size you want, so count how many panels you need first (each 2x1ft panel covers 2 sq ft, so a 10ft wide x 5ft tall screen needs 25 panels).
Step 3: Mount the Brackets (The Foundation of Your Screen)
Brackets are what hold your LED panels to the wall, so getting them level and evenly spaced is non-negotiable. First, hold the main mounting bracket (we supply these with every P4.81 kit, but if you’re building your own, make sure they’re rated for at least 2x the weight of your total screen) against the wall where you want the top of your screen to be. Use your level to make sure it’s straight—tilted brackets will lead to lopsided screens, and no one wants that.
Mark the drill holes with a pencil, then pre-drill them (if you’re using wood studs, regular screws work; concrete needs masonry screws). Screw the bracket into the wall firmly, then do the same for the lower mounting bracket. If your screen is going on a pole (like a street sign setup), use U-bolts instead of wall screws—just make sure the pole is sturdy enough to hold the wind load (I always advise checking local wind codes for your area, but most P4.81 setups work for moderate winds).
Another product we love for front-access installs (which makes repairs a breeze) is the Litestar OFM PRO 2x1ft Outdoor Front Service LED Sign Panel — it fits perfectly with our P4.81 frames, so you can swap out a panel without taking the whole screen down. That’s a huge win for DIYers who don’t want to climb a ladder every time a chip goes out.
Step 4: Wire the Panels (Keep It Simple, Don’t Overcomplicate)
Wiring is the part that makes most people nervous, but it’s actually super straightforward once you see how it works. Each P4.81 panel has two types of cables: power cables and data cables. Power cables carry electricity, data cables carry the video signal from the controller to each panel.
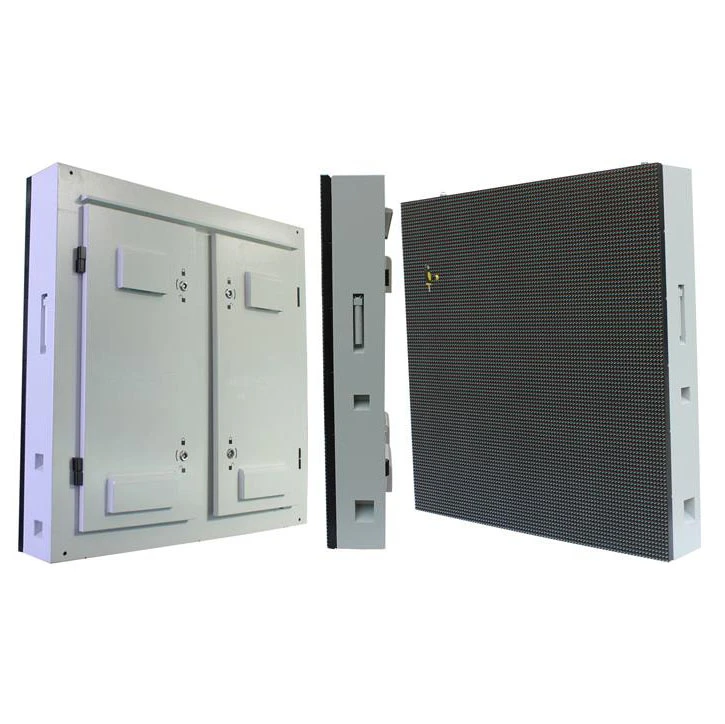

First, run your main power cable from the outlet (or a weather-proof power box, never plug directly into a regular outlet for outdoor use) to the wall near your mounting brackets. For longer runs, we recommend marine-grade cables—they’re resistant to moisture, which is key for outdoor screens. Then, start with the top-left panel: connect its power cable to the main power line, and its data cable to the next panel to the right. Keep doing this row by row until all panels are connected. For the last panel in each row, you’ll plug a “terminator” cable into the data port (it comes with your kit) to prevent signal interference.
Pro tip: Don’t run cables over sharp edges where they can get frayed, and use cable ties to secure them along the wall (leave a little slack, though—you don’t want to pull cables tight when mounting panels). If you’re working with a big screen, the Die Casting 960x960mm Multi-purpose Applications Cabinet is a great option—it’s modular, so wiring stays organized and panels lock together without gaps. No more messy cables peeking out between panels!
Step 5: Mount the Panels (Lock Them in Place)
Now the fun part: putting the panels on. Each P4.81 panel has a locking mechanism on the back—usually a small latch or screw that clips onto the mounting brackets. Start at the top-left corner: lift the panel onto the brackets, align the screw holes, and tighten the screws (don’t over-tighten—you’ll strip the holes). Then move to the right panel in the same row, lock it into place, and repeat until the first row is done. Then move to the row below, making sure each panel lines up flush with the one above (no gaps bigger than a finger—gaps cause dead spots in the video).
When you’re halfway done, plug in the controller and power up to check the display. It’s way easier to fix a misaligned panel or a loose wire now than after you’ve mounted all 25. Once all panels are secured, go back and double-check every screw and cable—you don’t want a panel falling off in a light wind. For ultra-slim, lightweight setups, the OFM Series Outdoor Light Weight And Slim Front Service 2ftx1ft IP68 Modular Led Panel With Ultra High Brightness Support Led Cube For Outdoor Digital Wall pairs perfectly with P4.81—its low profile means it sticks out less from the wall, which looks way cleaner for storefronts.
Step 6: Connect the Controller & Test Your Screen
The controller is the brain of your P4.81 display—it’s what sends video, images, or social media feeds to your panels. Most kits come with a basic controller, but you can upgrade to a Wi-Fi-enabled one if you want to change content from your phone or laptop (no more running back to the controller every time you need to update a sale sign).
Connect the controller to the last panel’s data cable, then plug the controller into power. Turn everything on, and you’ll see the controller’s home screen pop up—you can upload your content via USB, Wi-Fi, or an Ethernet cable depending on your model. Test different types of content: a bright image, a video clip, a scrolling text message—make sure everything looks crisp and no parts of the screen are flickering. If you have issues, double-check the data cables (loose cables are the #1 cause of display glitches) or the test pattern you ran earlier.
Common DIY Mistakes to Avoid (I’ve Seen ‘Em All)
- Skipping the wall prep: If your wall is uneven, your panels will be too, leading to a lopsided screen. Use a shim behind the mounting bracket if the wall has bumps.
- Not accounting for wind: Even if your screen feels secure, loose brackets can blow off in a strong gust. Test the screen with a gentle push once it’s mounted—if it wiggles, tighten the brackets more.
- Using indoor cables: Outdoor cables are weather-proof, indoor ones aren’t. Cheap indoor cables will fray in rain and short out, so invest a little extra in marine-grade if you’re in a rainy area.
- Overloading the power: Make sure your main power outlet can handle the wattage of your screen. A 10x5ft P4.81 screen uses about 1500 watts, so a standard 15-amp outlet (which is 1800 watts) works, but if you’re wiring multiple screens, hire an electrician to upgrade your panel.
Now that your P4.81 screen is up and running, the next step is keeping it in good shape. We recommend wiping it down with a soft, dry cloth every few weeks (avoid harsh chemicals—they can damage the LED chips) and checking cables after heavy storms. If you ever need to replace a panel, remember our front-serviceable options like the Litestar OFM PRO—you don’t have to take the whole screen down, just pull the faulty panel out from the front and slide a new one in.
As a P4.81 LED display supplier, our whole team is here to help if you hit a snag mid-install. We’ve got free video tutorials, troubleshooting guides, and even customer support that walks you through wiring or mounting steps over the phone. Whether you need extra panels, replacement parts, or advice on sizing your screen, we’re just a message away for a free consultation.
If you’re ready to pick up a P4.81 kit or browse related products, feel free to reach out to our team to discuss your project—we’ll help you build a setup that fits your space and budget, no overcomplicated jargon required.
References
Smith, J. (2023). Outdoor LED Display Installation: A DIY Guide for Small Businesses. TechPublish Press.
LED Industry Association. (2024). Best Practices for Modular LED Display Installation. National Lighting Standards Board.
Global Display Solutions. (2022). Pixel Pitch Selection for Outdoor Digital Signage. LED Tech Journal.